Just remember, education is the doorway to happiness. To receive a good education, you will need good teachers. Also, you will need to be up on the latest tech.
Step 1: Choose the images
Select the images you want to print as thumbnails. You can either use a folder containing multiple images or choose individual images from different locations on your computer.
Step 2: Organize your images
Arrange the images in your preferred order. This may require renaming files or using a photo organizing software that allows you to drag and drop images easily.
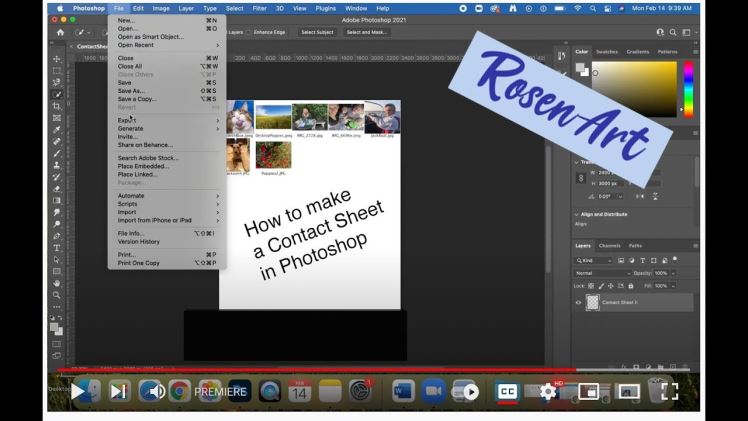
Step 3: Open your photo printing software
Use a photo printing software, such as Adobe Photoshop, Microsoft Paint, or GIMP, for creating and printing thumbnails.
Step 4: Create a new document
Open a new document or canvas in the software, selecting the dimensions to match your desired thumbnail size.
Step 5: Set up your grid
Create a grid as a guide for placing thumbnails on the document. This can be done by enabling gridlines in the software or manually drawing lines on separate layers.
Step 6: Resize images
Resize each image to fit within one cell of the grid. Ensure that the aspect ratio of each image remains preserved.
Step 7: Place images on the grid
Add resized images to your new document by dragging them onto their respective cells within the grid or using copy-pasting methods.
Step 8: Add white space (optional)
You may add white space between images for visual appeal and separation purposes.
Step 9: Save your work
Save this new document with all thumbnails placed on it as a JPEG or other suitable image format.
Step 10: Load paper into printer
Insert paper into your printer, ensuring that you’re using an appropriate paper type and size for printing thumbnails.
Step 11: Choose printer settings
Access your printer settings in your selected printing software or directly through your printer settings menu. Adjust print quality, scaling, and other settings as needed.
Step 12: Select “Print” from your software’s File menu
After configuring your printer settings, click on “Print” and select your destination printer.
Step 13: Monitor the print job
Keep an eye on the print progress and ensure there are no errors during the printing process.
Step 14: Cut out and arrange thumbnails (optional)
After printing, you can cut out your thumbnails if desired and arrange them in a photo album, scrapbook, or on a display board for presentations.
By following these comprehensive steps, you now have a reliable method to create and print thumbnails for various uses. The process is easily customizable, allowing you to produce thumbnails quickly and efficiently.